My Phoniebox installation - 2023 edition
I built a Phoniebox for my kids, please see my first blog post for details. Overall the box worked very good. But sometimes the box would restart out of the blue (sometimes multiple times in a row).
So I decided to rebuilt the Phoniebox with the new-and-shiny version 3.x with branch future3/develop and some new hardware parts.
What I Wanted
For my kids I wanted to use RFID cards. In addition the box should have buttons for Play/Pause, Next, Previous, Volume up and Volume down.
I wanted the box portable, so I needed a power bank.
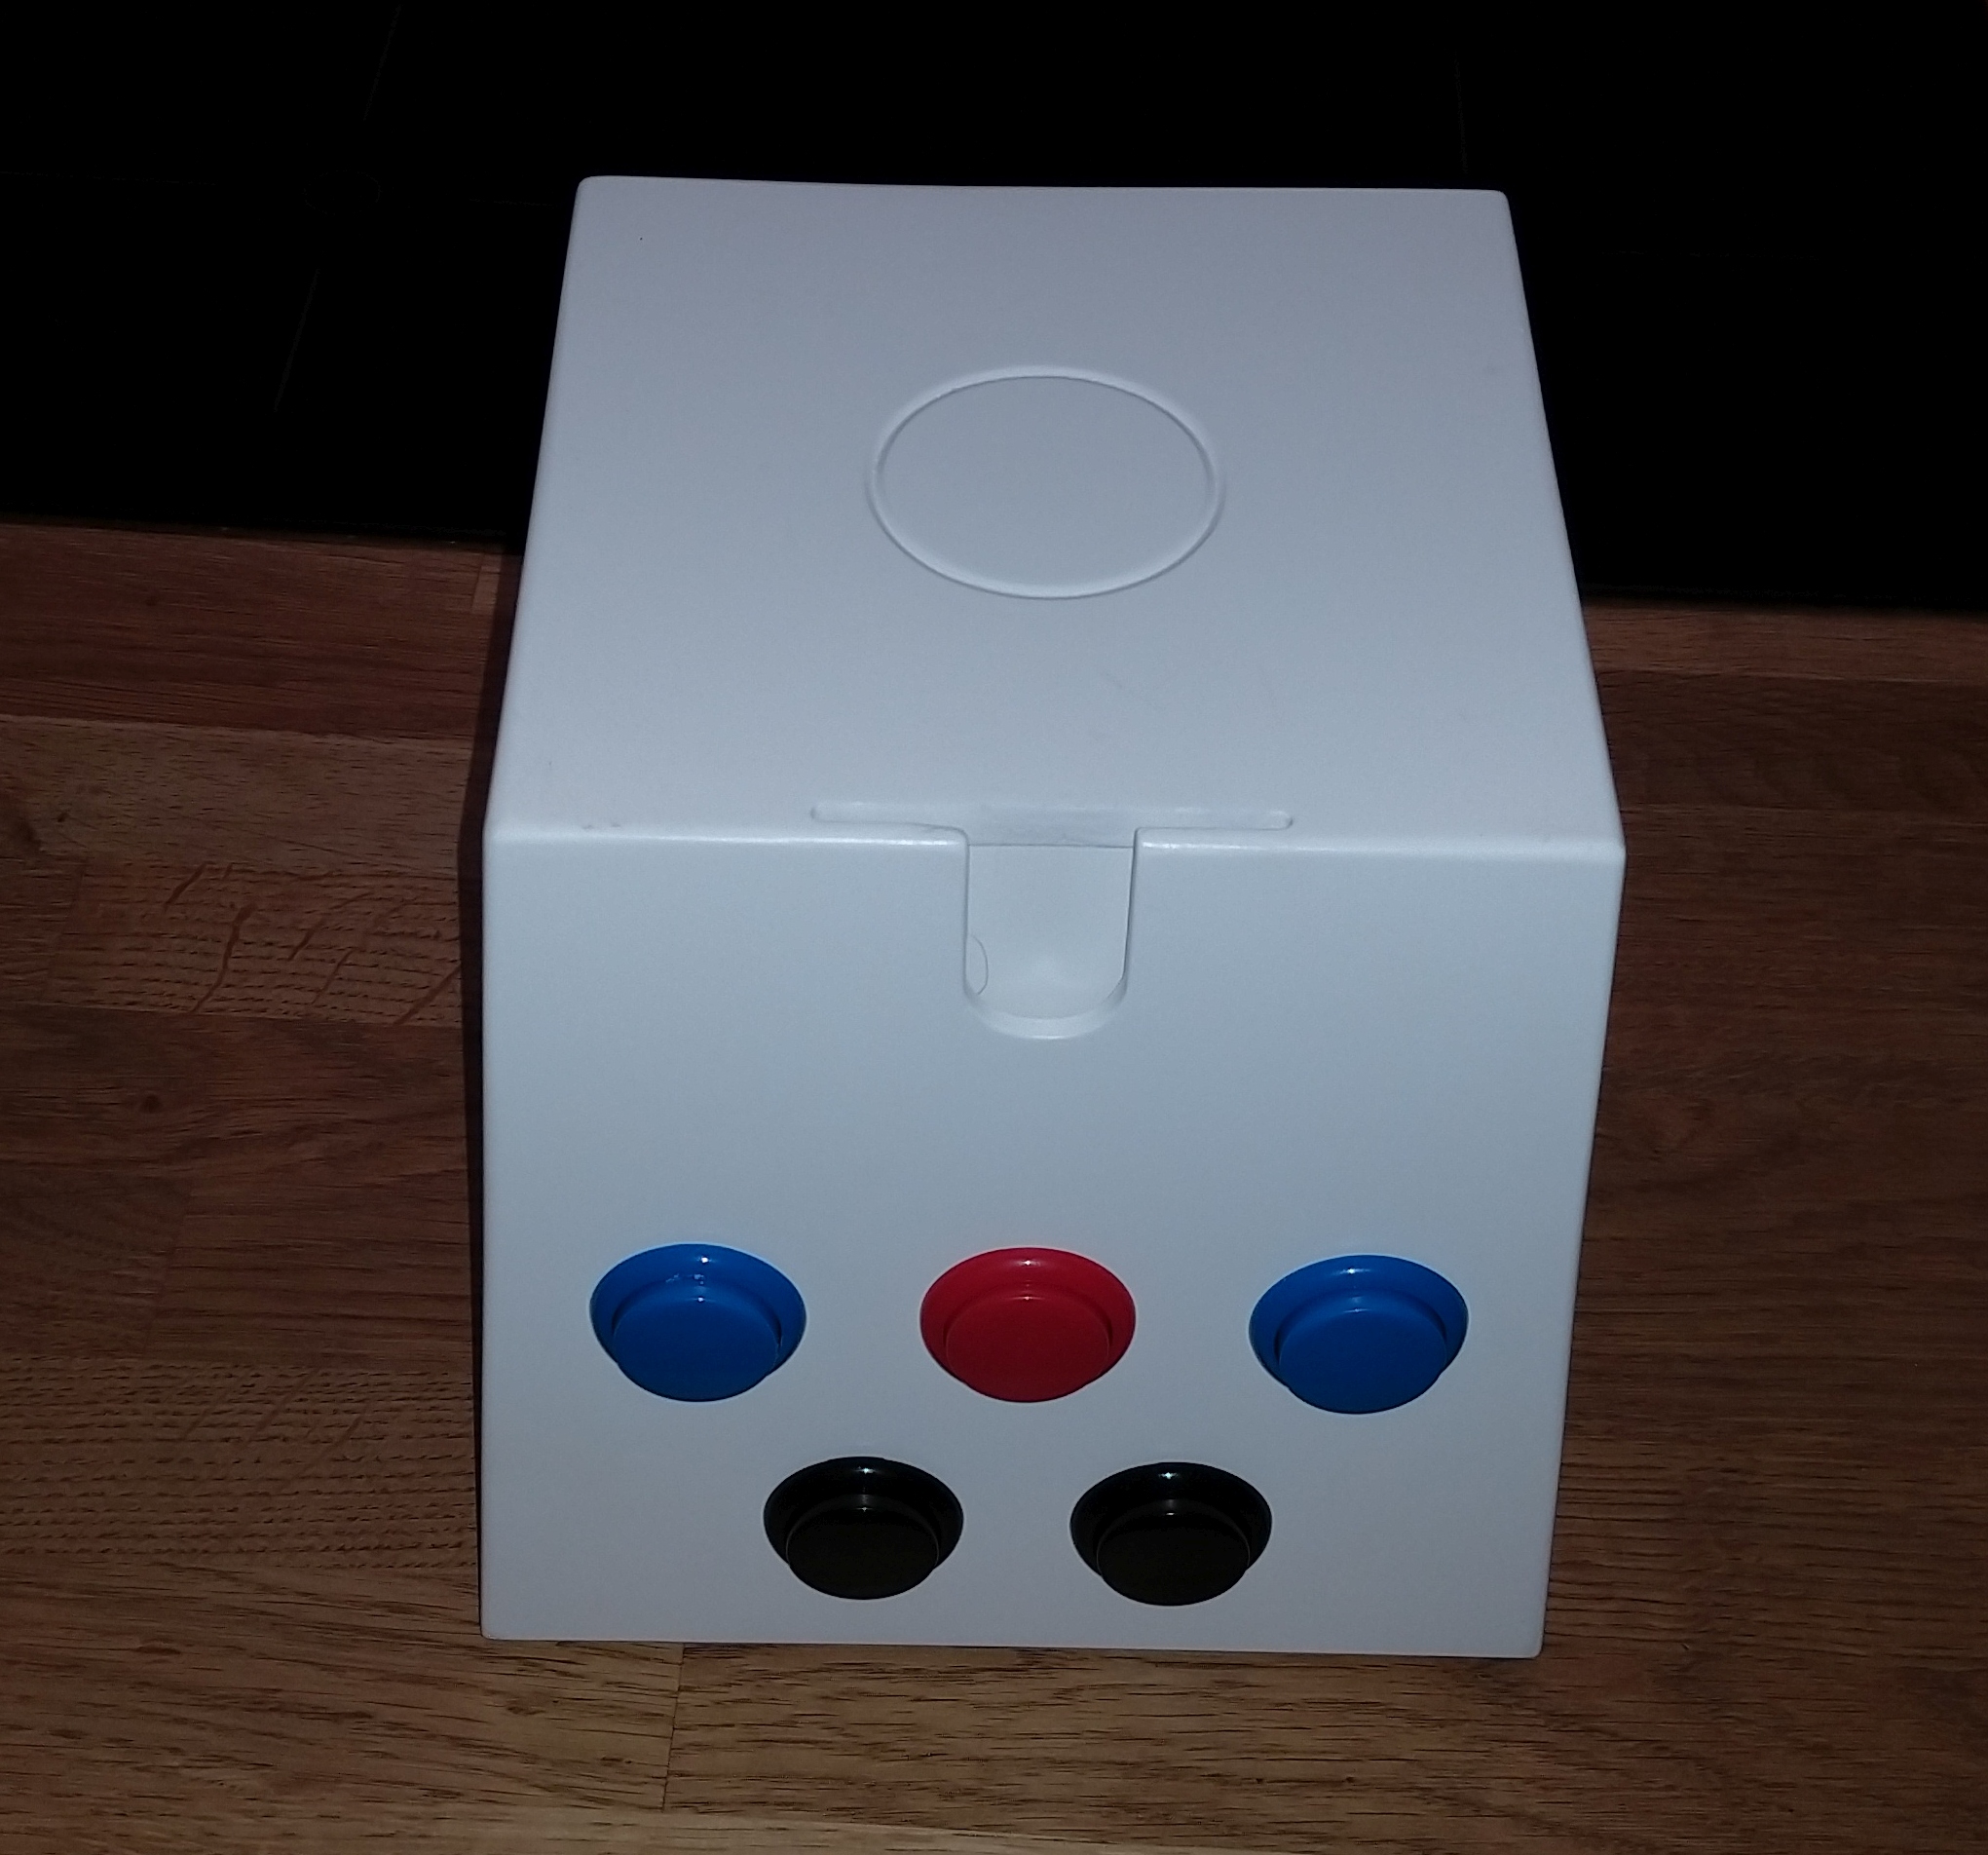
My friend has built a excellent custom-made wooden case which helped to fulfill my needs.
That blog post (in German) provided lots of information and I used especially the On/Off description.
[!WARNING] The info in the mentioned blog post is somewhat dated, so you might need to adjust some things.
Hardware
For hardware I decided to use the following or reused it from my first Phoniebox:
- Raspberry Pi 3 (doesn’t need an active cooling)
- GPIO Expansion Board
- Amplifier Hifiberry Miniamp
- Ravpower Powerbank
- Neuftech RFID reader
- OnOffShim
- Arcade buttons
- Power button
- …
Building
Wiring and Hardware Installation
I connected and soldered everything first, before I assembled the complete box to make sure everything works.
Excellent resource for the pinning is pinout.xyz.
Overview Wiring
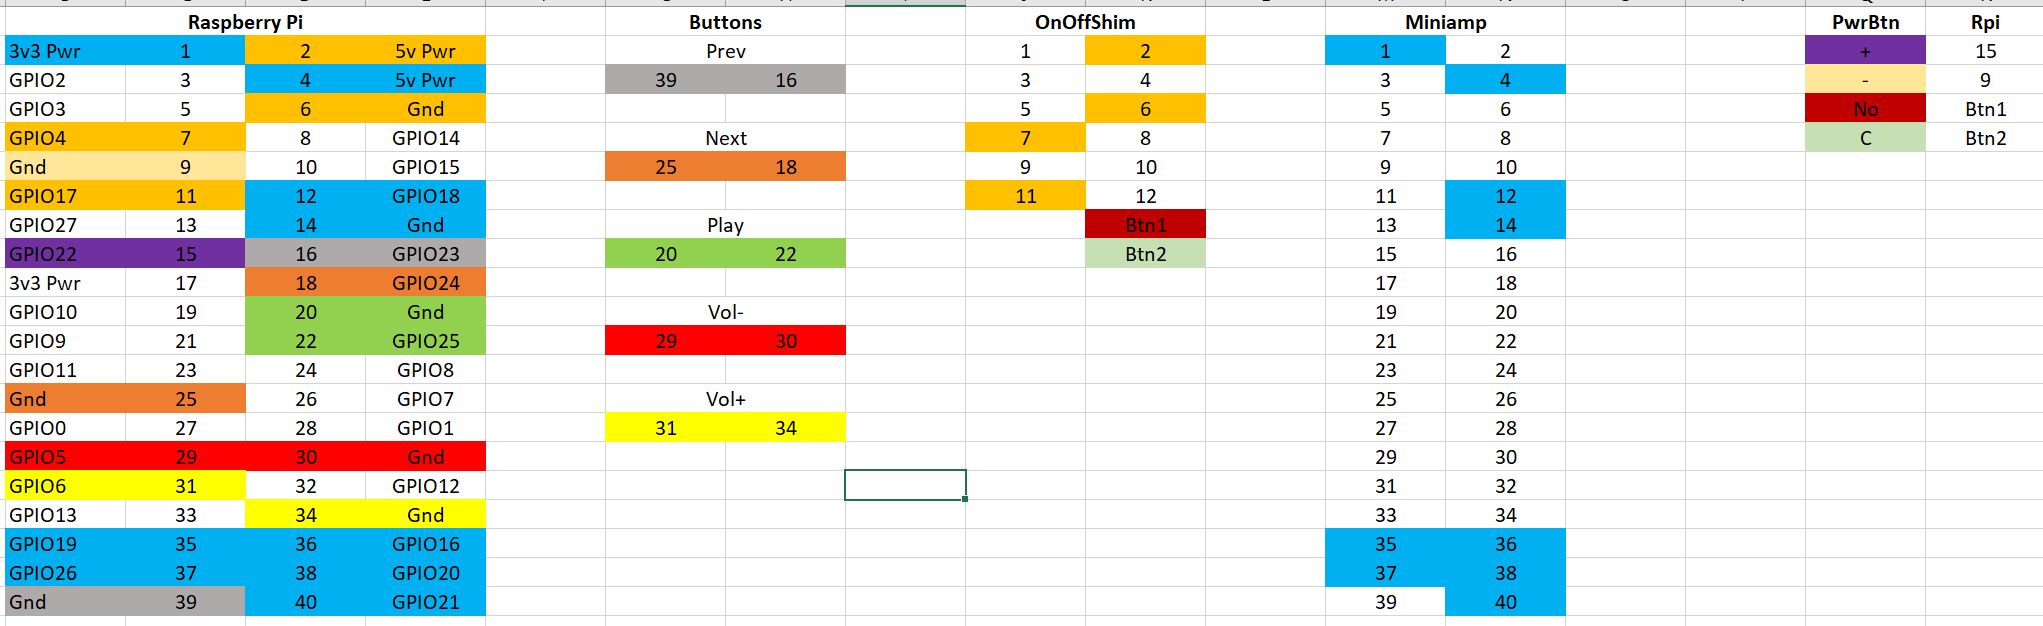
Buttons
- Prev: pin 39 (GND), pin 16 (GPIO23)
- Next: pin 25 (GND), pin 18 (GPIO24)
- Play: pin 20 (GND), pin 22 (GPIO25)
- Vol-: pin 29 (GPIO5), pin 30 (GND)
- Vol+: pin 31 (GPIO6), pin 34 (GND)
Miniamp
- Connect the Miniamp to Raspberry Pi
- pin 1 (3V)
- pin 4 (5V)
- pin 14 (GND)
- pin 12 (GPIO18)
- pin 35 (GPIO19)
- pin 36 (GPIO16)
- pin 37 (GPIO26)
- pin 38 (GPIO20)
- pin 40 (GPIO21)
-
Connect the speakers to the Miniamp (
-L+and+R-), see also the datasheet.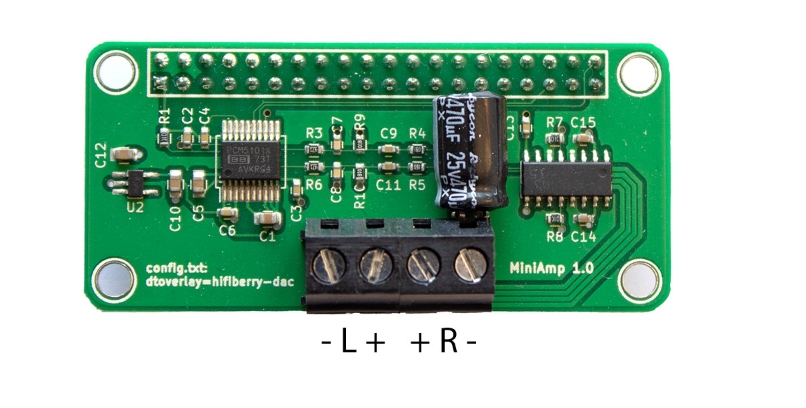
OnOffShim & Power Button
- Pinout OnOffShim
- Connect the OnOffShim to Raspberry Pi
- pin 2 (5V Power)
- pin 6 (GND)
- pin 7 (GPIO4)
- pin 11 (GPIO 17)
- Connect Btn1 of OnOffShim to NO (Normal Open) of Power Button
- Connect Btn2 of OnOffShim to C (Common) of Power Button
- Connect pin 15 (GPIO22) of Raspberry Pi to
+of Power Button - Connect pin 9 (GND) of Raspberry Pi to
-of Power Button (?? currently works only with - connected to GPIO7 / pin 26??)
Installation
- Follow the installation instructions for future3 with the following changes:
[!WARNING] Use Bullseye Lite 32 bit image! Bookworm or 64 bit do not work with Phoniebox (yet).
And I use the
future3/developbranch - I use the following settings
- Don’t use IPv6, Bluetooth, Kiosk mode, Autohotspot
- As I don’t use the Release branch I need to build the web app locally. IMPORTANT: install node first (see link)!
- I connected my USB reader before the installation and selected it during install
- Reboot
- Install Hifiberry Miniamp using the provided script
- ?? Follow the audio configuration instructions and checks
- Install OnOffShim software
- Use this one line command:
curl https://get.pimoroni.com/onoffshim | bash - ?? Set
daemon_active=1,led_pin=22andhold_time=1in file/etc/cleanshutd.conf - TODO weg: sudo apt-get install libczmq-dev
- TODO weg: in src/cli_client: gcc pbc.c -o pbc -lzmq -Wall
- ?? Make sure the original Phoniebox shutdown script is used: Open
sudo nano /usr/bin/cleanshutdand replaceshutdown -h +$shutdown_delaywithsource ~/RPi-Jukebox-RFID/.venv/bin/activate; ~/RPi-Jukebox-RFID/src/jukebox/run_rpc_tool.py -c host.shutdown; deactivate. Be aware thatshutdown_delayhas no effect anymore.
- Use this one line command:
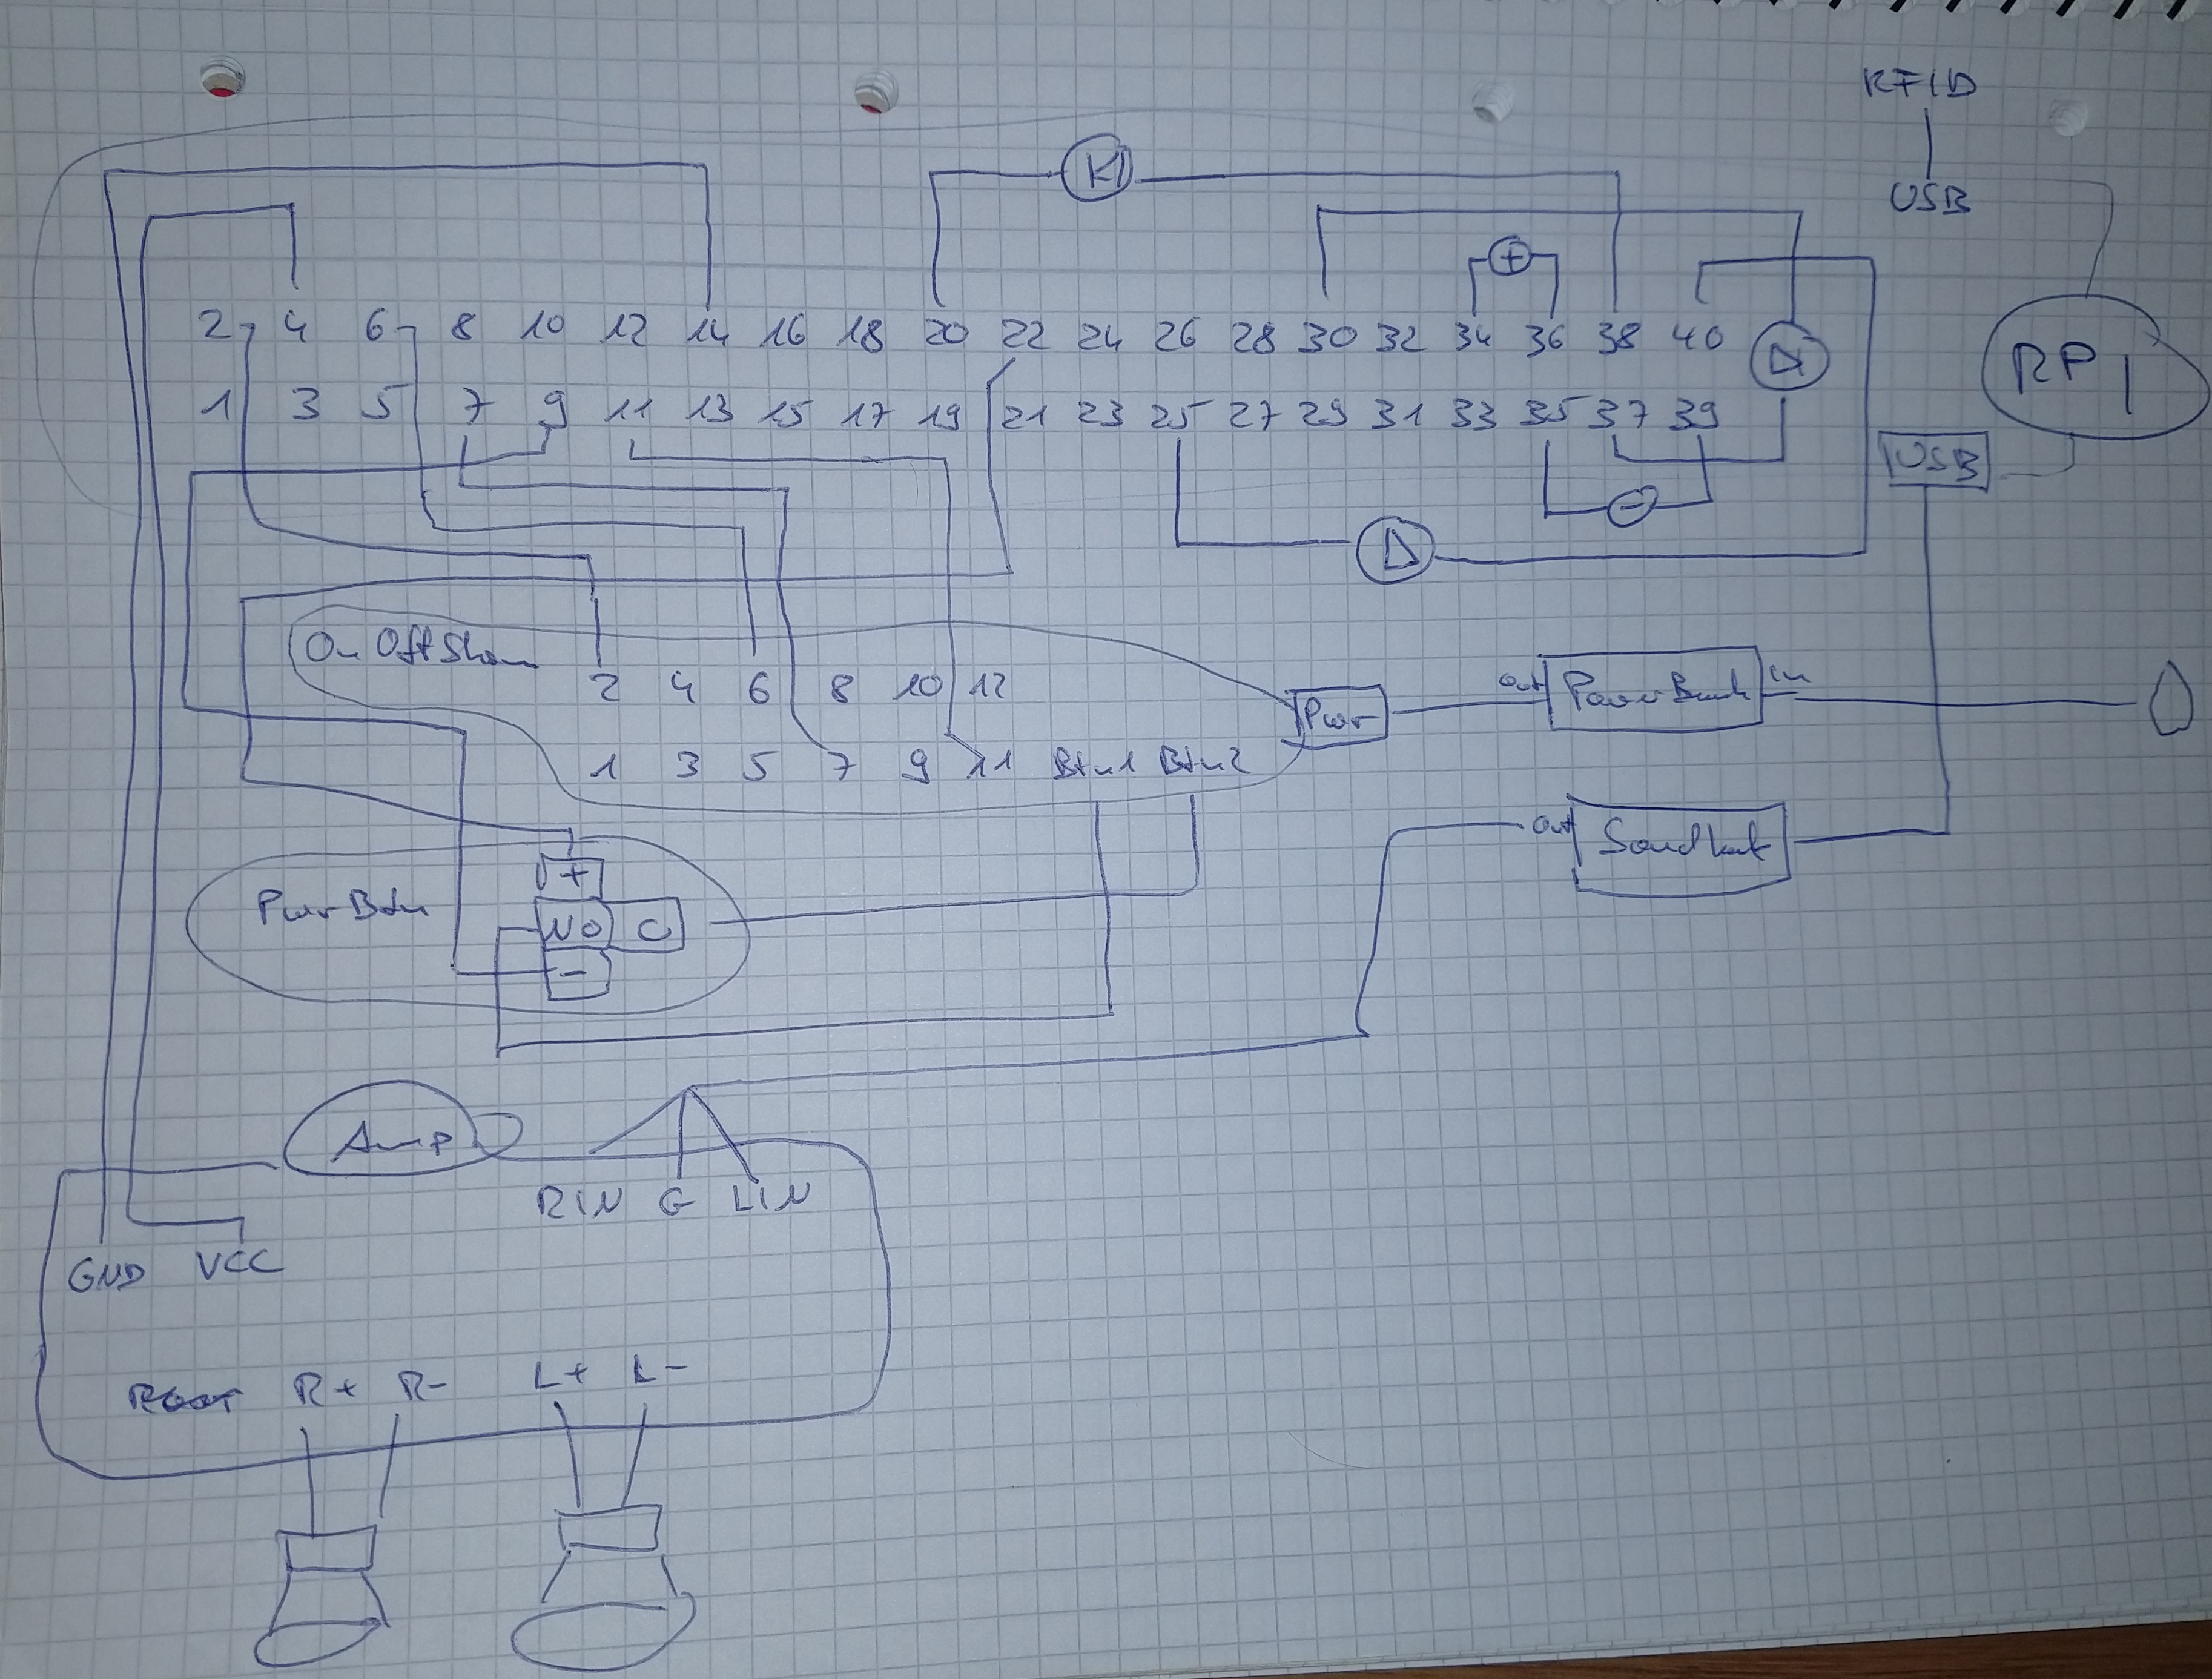
Wiring Sketch:
Software configuration & installation
dann so wie hier http://splittscheid.de/selfmade-phoniebox/#miniampsetup
Software installation first, so everything can be tested.
- I configured the sound according to this description.
- To use the buttons I configured the GPIO settings according to this manual, but without the shutdown, because I use the OnOffShim (see later steps). In the file
scripts/gpio-buttons.pythe pins can be configured and (de)activated. I don‘t use recording although the case and the hardware supports it.
Gotchas, Lessons learned
- It’s really important to solder as good as possible (I’m not very good though). If you have cold solder joints it may or may not work, which can be really annoying.
- Connecting everything together first to test it is really helpful, because you don’t want to assemble everything together in a (tiny) case and then something doesn’t work.
- It really helps to sketch the wiring on a piece of paper, so you can fix possible issues or misconnections much faster.