My Phoniebox installation
WORK IN PROGRESS
For Christmas 2019 I built my kids a Phoniebox after a friend told me how much fun he had.
These are some notes for me to remember how I built it.
What I wanted
For my kids I wanted to use RFID cards. In addition the box should have buttons for Play/Pause, FF, Rwd, Volume up and Volume down.
I wanted the box portable, so I needed a power bank.
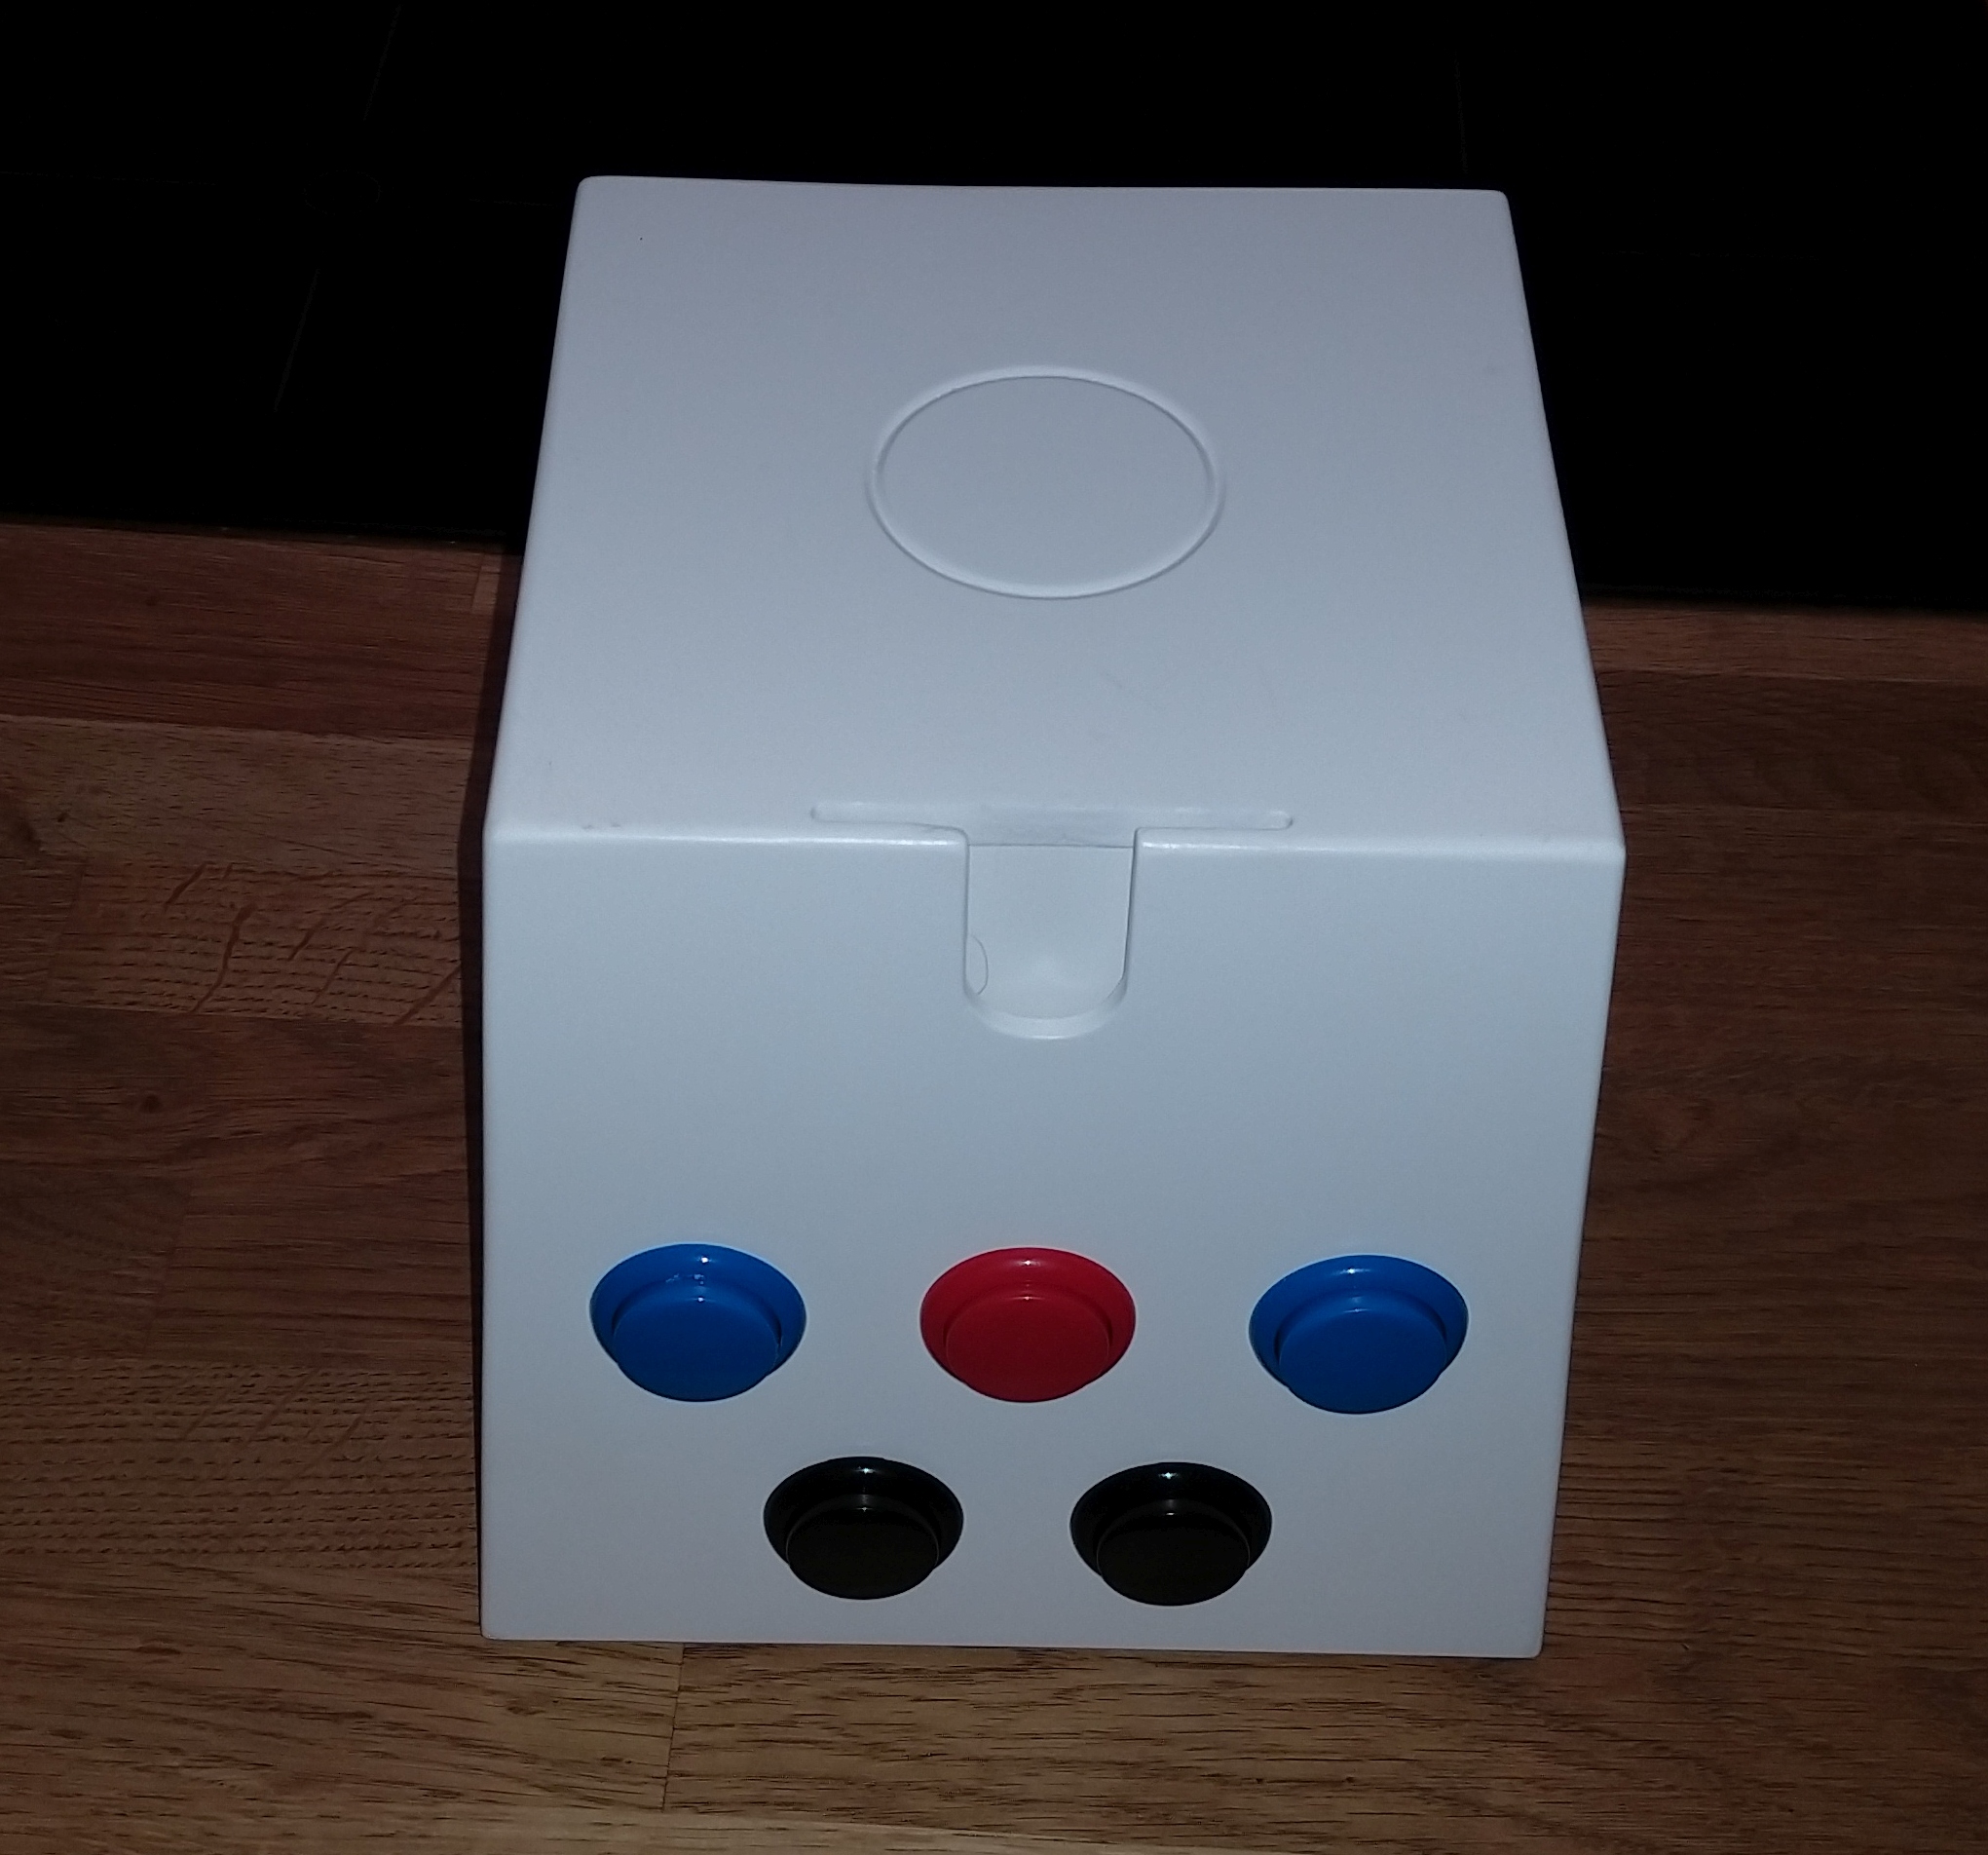
My friend has built a excellent custom-made case which fulfills my needs.
That blog post (in German) provided lots of information and I used especially the On/Off description. Thanks for providing that info!
Hardware
I used the following hardware:
- Raspberry Pi 3 (doesn’t need an active cooling)
- Ravpower ??? Powerbank
- Neuftech RFID reader
- USB sound card
- 5W Amplifier
- OnOffShim
- Arcade buttons
- Power button
- …
Building
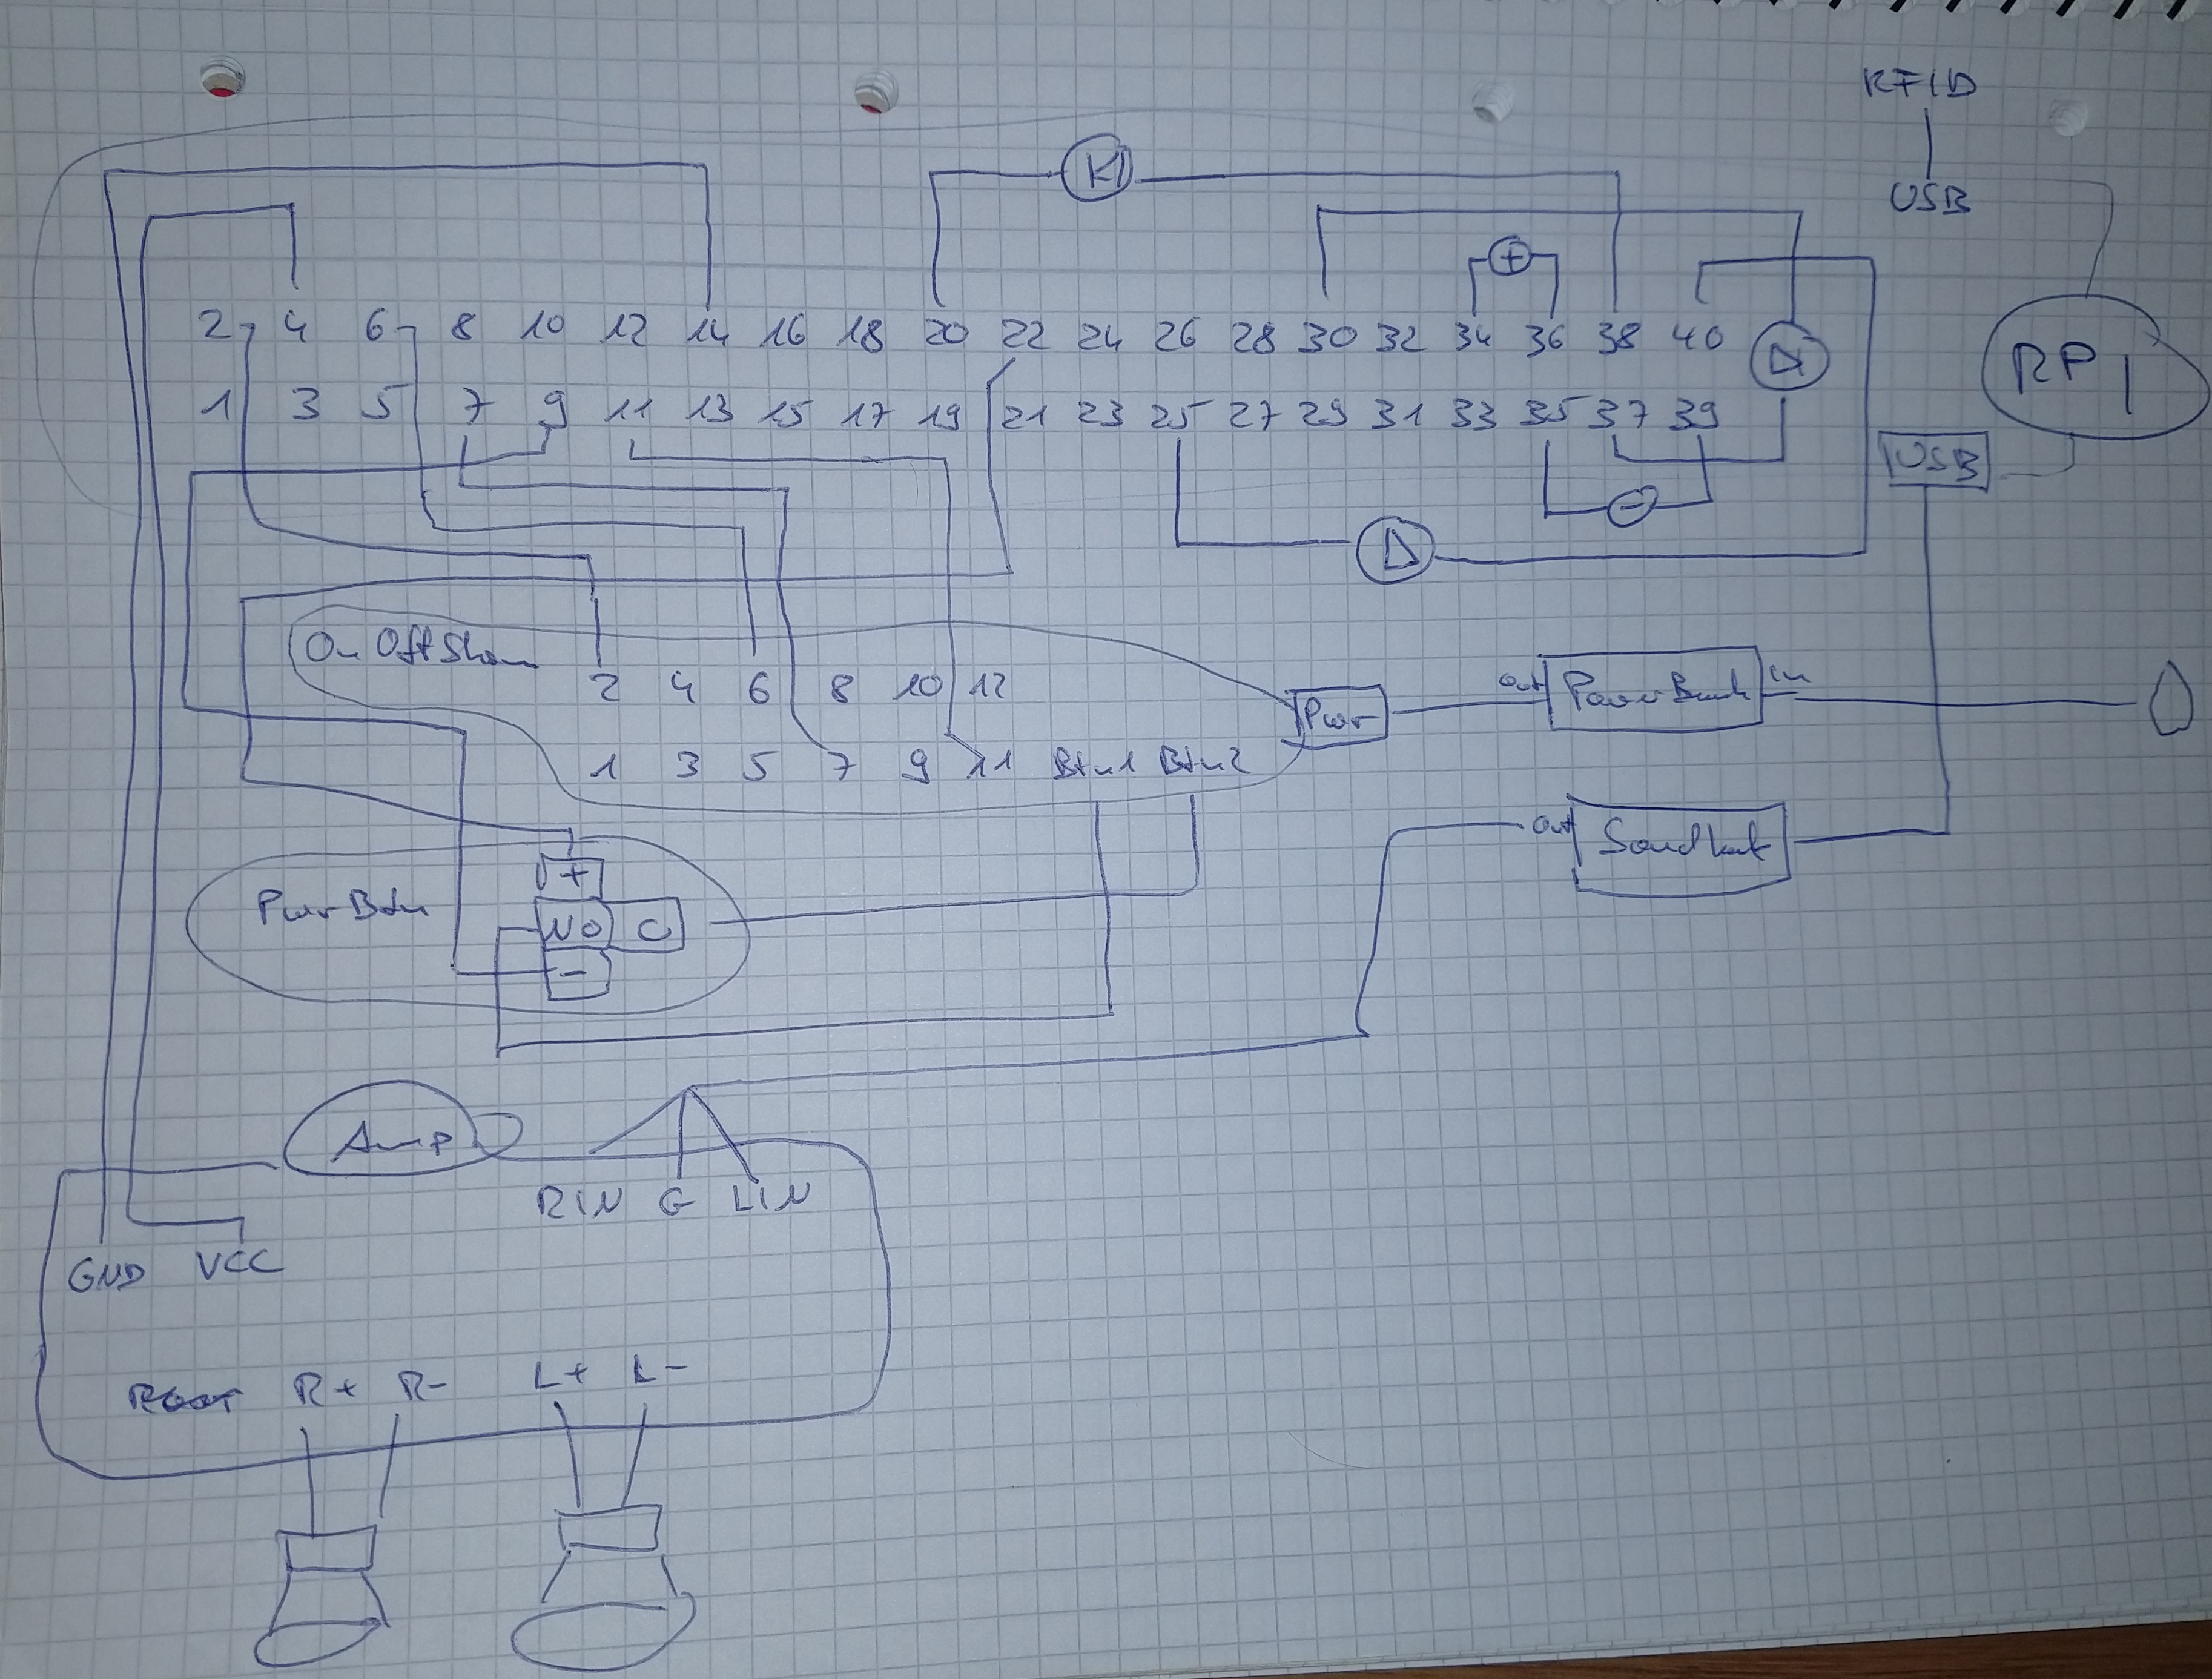
I connected and soldered everything first, before I assembled the complete box to make sure everything works.
Wiring Sketch:
Software installation
Software installation first, so everything can be tested.
- Download latest Raspian Lite image
- Install Raspberry Pi with BalenaEtcher
- Preconfigure WiFI in image, see here
- Rename to phoniebox with
sudo nano /etc/hostname - Login with ssh (default user name:
pi, default password:raspberry) -
Install Phoniebox software (for Raspian Buster)
-
Use this one line command:
cd; rm buster-install-*; wget https://raw.githubusercontent.com/MiczFlor/RPi-Jukebox-RFID/master/scripts/installscripts/buster-install-default.sh; chmod +x buster-install-default.sh; ./buster-install-default.sh -
See also here for details.
-
I use the Classic version as I don’t use Spotify and it’s supposed to be faster.
-
- I configured the sound according to this description.
- To use the buttons I configured the GPIO settings according to this manual, but without the shutdown, because I use the OnOffShim (see later steps). In the file
scripts/gpio-buttons.pythe pins can be configured and (de)activated. I don‘t use recording although the case and the hardware supports it. -
Install OnOffShim software
-
Use this one line command:
curl https://get.pimoroni.com/onoffshim | bash -
Set
daemon_active=1,led_pin=25andhold_time=1in file/etc/cleanshutd.conf -
Make sure the original Phoniebox shutdown script is used: Open
sudo nano /usr/bin/cleanshutdand replaceshutdown -h +$shutdown_delaywith/home/pi/RPi-Jukebox-RFID/scripts/playout_controls.sh -c=shutdown. Be aware thatshutdown_delayhas no effect anymore.
-
- Reboot with
sudo reboot.
Gotchas, lessons learned, etc.
- It’s really important to solder as good as possible (I’m not very good though). If you have cold solder joints it may or may not work, which can be really annoying.
- Connecting everything together first to test it is really helpful, because you don’t want to assemble everything together in a (tiny) case and then something doesn’t work.
- It really helps to sketch the wiring on a piece of paper, so you can fix possible issues or misconnections much faster.
to be continued